Time summarize 2014

December 31, 2014

Well its time to look back at 2014.

The year had a slow start with a long assignment away from home, which wasn’t ideal. On top of that my application for TechEd Houston was turned down.

In May it turned around, something that made me really happy happened. I was invited by Microsoft to the TechEd Europe Roundtable discussions in Barcelona.

A long warm summer followed with much fun with my family.

In August I started a new job at Crayon and a really busy autumn followed.

Thanks to my #theKrewe friends I once again went down to Barcelona in October for TechEd Europe and was staffing during the Ask the Experts evening.

In early December I traveled to Amsterdam to attend a Microsoft Cloud OS training.

I look forward to 2015 I got a feeling that the new year has a lot to offer.

See you on the other side


Nesting Hyper-V Part 1

December 31, 2014

My first blog post is also one of my most successful Lab-V, nesting Hyper-V creating your own lab

I thought it is about time I make a proper post out of that one. I can’t even remember how many times I have battled the really useful feature of nesting hypervisors. Follow my vlog and you will learn the awesome stuff you can do with nested hypervisors.

We will start by nesting Hyper-V on Hyper-V for those of you that just want to get familiar with nesting on the Microsoft platform. Microsoft Hyper-V has some limited functionality that enables you to nest Hyper-V.

Nesting Hyper-V on Hyper-V:

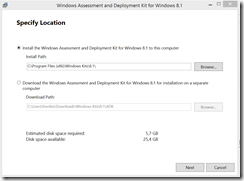
  1. Download and install the Windows assessment and deployment kit for Windows 8.1 Update 
    Select your installation folder
    image
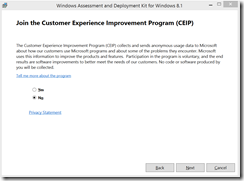
    Choose wheter or not to participate in the CEIP
    image
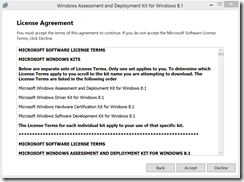
    Accept the License Agreement
    image 
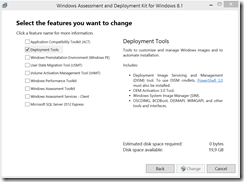
    Select the features you want to install:
    We only need this feature for this exercise.
    image 
  2. Mount and copy the content of your Windows 2012 R2 ISO to a folder. In my case C:\TempInst\Win2012R2.Lab-V
  3. Open a command prompt and enter the command
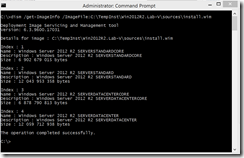
    dism /get-ImageInfo /ImageFile:C:\TempInst\Win2012R2.Lab-V\sources\install.wim
    image 
    Choose witch version you’d like to edit
    1. Create a empty folder on to whish you will execute your imagedism /Mount-Image /ImageFile:C:\TempInst\Win2012R2.Lab-V\sources\install.wim /Index:4 /MountDir:C:\TempInst\Lab-V
      image 
      To get a list of features run the command
      dism /Image:C:\TempInst\Lab-V /Get-features /Format:List
  4. We will enable the Hyper-V feature
    dism /Image:C:\TempInst\Lab-V /Enable-Feature:Microsoft-Hyper-V
    image 
  5. Save the changes and unmount the image
    dism /Unmount-Image /mountdir:C:\TempInst\Lab-V /commit
    image

Now create a ISO of the folder C:\TempInst\Win2012R2.Lab-V and use it to install a VM in your environment and voila a woring Hyper-V inside your Hyper-V.

Now to the not so god part, you can create VMs inside the nested Hyper-V but you cannot start them. I have debated several hours regarding the usefulness of this, but for now that’s the way it is.

To be able to do so you must use another hypervisor. But that is my next blog post, stay tuned