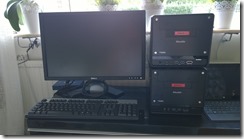
 I powerful lab doesn’t have to be expensive.
The reason I started blogging was that I wanted to help a friend of mine getting started with a lab setup and it turns out that that post has been one of the more popular ones. I have decided to be more active on my blog and share the things I find.
What would be better then start off the 2.0 version of the blog where I once started.
Building your own Azure in the living room
In a series of articles I will build a home lab complete with operations system, management software and virtual machines. I will use Windows Server 2012 R2, System Center 2012 R2. I will use evaluation software downloaded from TechNet Evaluation Center More on that in the next part of the series
Part 1: The hardware
I wanted two machines so that I could build a cluster. I got the hardware for the lab little over a year ago and have complemented the purchases since then. Each of the machines are equipped with a Intel i5 processor, 32 GB RAM and three hard drives, one mechanic large drive for more static content, ISO, templates and such and two blistering fast SSDs.
Some of the hardware is a little bit old at the moment so you might need to get some newer parts if you want to build the machines. On the other hand used parts are now a bit cheaper and the speed of this rig is pretty awesome so that might be a cheaper way to go.
I wanted to get some relative small form factor and decided to go with the Shuttle XPC Barebone PC.
The integrated motherboard and the ability toadd up to 32 GB RAM and the necessary expansion slots/functions needed for the lab. Based on my experience you can never get enough RAM so to lower the cost of the rig I decided to go for the i5 processor and get all the RAM at once.
The components I complemented the PCs with are listed below.
Processor:
Intel Core i5-2320 Quad-Core Processor 3.0 GHz 6 MB Cache LGA 1155 – BX80623I52320 (EOL)
Memory:
Corsair XMS3 — 32GB DDR3 Dual/Quad Channel Memory Kit
Storage:
OCZ Agility 3 – SATA III 2.5″120 GB (EOL)
INTEL 530 240GB SATA SSD MLC
WD Green WD20EARX 64MB 2TB
I use the smaller SSD drive for the OS and the Intel SSD for the VM:s as mentioned before the 2 TB spinning disk are used to store images and tools and less intensive VMs
Stay tuned for the next part in the Building your own Azure in the living room series.
Part 2: The Windows 2012 R2 installation
By the way my wife approves of keeping the machines in the living room.


 Posted by fredriknilsson_
 Fredrik is a highly qualified and innovative Principal Consultant with deep experience of the different aspects of Service Delivery.